Intro to User Settings in Lendware
The User Settings section allows each user to personalize their experience within Lendware, update login credentials, and manage outbound communication preferences.
All changes made in User Settings apply only to the currently logged-in user, but these preferences will carry over to any team that the user is a part of, ensuring consistency in all communications.
Accessing User Settings
To begin:
Click your name in the upper-right corner of the screen.
Select Your Profile.

- User Profile
- Settings
- Integrations
- Notifications
Profile
The Profile section is where you can update personal information. Many of these fields can be used as merge fields in emails and text messages, which helps personalize automated communications.
Headshot
Your profile image will appear within Lendware and can also be included in email templates and signatures.
To upload or update:
Click the yellow Edit button next to your photo.
Select an image from your computer.
Save your changes.

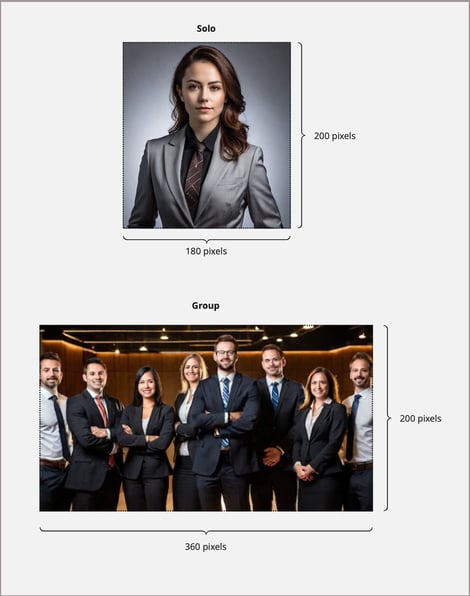
Tip: For best results when using your photo in merge fields, follow the recommended size guidelines (within ±20%).
- Personal Details - Here we will add a First Name, Last Name, Job Title, Email and Phone Number. Simply edit the information and click the yellow 'Save' button.
To edit the Personal Image, click the yellow 'Upload Image' button. Next, we'll find the appropriate image on our computer, then choose the image. When complete, click the yellow 'Save' button.
To view and update any details section, click the down-arrow to expand each section individually. - Demographic Details - This section contains physical address details. Most likely, we'll want this to match our licensing.
- Business Information - This is where we can really customize information for merging into communications. These are not required fields, however, it is highly suggested that every field is filled-out. As each may be used as merge fields in communications.
In the below animated GIF, we'll demonstrate updating the fields. It's important to note that any website link offers the ability to provide display name text. This enhances the merge fields for website links to display the text we want, while creating a link with the URL hidden (on emails only - this is not possible in text messages). - Social Links - Just like with the links in the above section, these can include display name text. They also are not required fields, but recommended each are filled-out.
If we do not have a specific social media account, likely, out team lead or company does. So, if we don't have an Instagram account, we'll just use our company's account.
Your profile image will appear within Lendware and can also be included in email templates and signatures.
To upload or update:
Click the yellow Edit button next to your photo.
Select an image from your computer.
Save your changes.
To edit the Personal Image, click the yellow 'Upload Image' button. Next, we'll find the appropriate image on our computer, then choose the image. When complete, click the yellow 'Save' button.
To view and update any details section, click the down-arrow to expand each section individually.
In the below animated GIF, we'll demonstrate updating the fields. It's important to note that any website link offers the ability to provide display name text. This enhances the merge fields for website links to display the text we want, while creating a link with the URL hidden (on emails only - this is not possible in text messages).
If we do not have a specific social media account, likely, out team lead or company does. So, if we don't have an Instagram account, we'll just use our company's account.

👍 This concludes editing User Profile section of User Settings
Account Settings
In Account Settings, we can update our password and time-zone (Location Settings). This is also were we can provide Support Access for high-level Lendware support - learn more here.

- To update your password, click the yellow 'Reset Password' button. A new tab will open, allowing you to 'Change Your Password'. You must choose a password that meets the following requirements.
- At least 8 characters long
- At least 3 of the following 4 options
- At least 1 lower case letter (a-z)
- At least 1 UPPER case letter (A-Z)
- At least 1 number (0-9)
- At least 1 special character (e.g. !@#$%^&*)
As you type your password, the requirement options will turn green when they are met. You can also click the 'eye' icon within each password field to view the password. This can come in handy if the two fields do not match. It can also be useful when confirming you typed it correctly.
- Location Settings - Time-zone - It's important to have an accurate time-zone for your location. The time-zone set will affect the sending of drip campaign emails and text messages, as well as provide a baseline for task timing and due times.
Find the appropriate time-zone, choose it and then click the yellow 'Save' button.
👍 This concludes editing User Account Settings
Integrations
On the integrations page, we can connect our email for outbound communications when sending direct emails and transactional (loan) emails. We can also add or update our email signature.
What makes the email integration even more powerful is that it will capture all email conversations, even if they happen from your email client from our laptop and mobile devices. As long as the email is sent or received by the integrated email address, Lendware will capture the conversation and link it with the appropriate contact.

- If your email is already integrated, we will see it on the bottom-left of the Email Integrations box. If we want to change the email, click the 'trash can' icon on the right. For instruction on setting-up email integration, follow this link.
- Editing or adding a signature - click the 'Edit Signature' button on the right. Next, the Edit Signature drawer will slide-out on the right. This will look familiar, as it is quite similar to the send email builder. For instructions on how to use the email editor, follow this link.
- Finally, there may be a third option on the Integrations page for integrating with our Enterprise Domain. This is setup and initialized by our enterprise administrator. To learn how to set this up as a user, follow this link.
👍 This concludes the User Integration Settings
Notifications
This section of our user settings will allow us to turn 'on' and 'off' notifications that are sent when certain events happen.
Activity Updates will allow us to tailor how we receive and for which activity we choose. To learn about how Notifications work and more information on these settings, click here.
👍 This concludes Notification Settings - and - User Settings article
Related Articles
Intro to Team Settings
Team Settings is your central hub for customizing and organizing how your team operates in Lendware. From here, you can configure team details, statuses, custom fields, integrations, and more. These settings ensure your workflows stay aligned and ...Add an Email Signature to Your User Settings in Lendware
A professional email signature is essential for consistent branding, compliance, and a polished look in all your communications. In Lendware, adding a signature is quick and easy, whether your company has a Marketing Department, an HTML-savvy ...Enterprise Domain User Setup – Send All Email Using Your Company Domain (Email Integration)
If your enterprise admin has enabled an Enterprise Domain, you can easily set up your company email for sending marketing, newsletters, nurture sequences, and more. This ensures full brand consistency for all outgoing emails. This walkthrough is only ...User Integration with Encompass
Connecting a user to your company’s Encompass integration is quick and easy. It can be completed by the user themselves, a Team Lead, or your Lendware Admin. Before you are able to integrate a user with your company's Encompass account, it must first ...Integrate Your Inbox in Lendware (Outlook or Gmail)
In the Account Settings, you can connect your company email to send direct emails to contacts and automated transactional emails. This will also enable a two-way integration connecting emails you send from your computer or phone's email client. 🎉 ...