How to Test an Automation Before Going Live
Following a simple testing process can help prevent common issues such as automations not triggering, incorrect timing, or unexpected enrollments.
Step 1: Create an Internal Test Contact
Before testing an automation, create a contact that can safely be used for internal testing.
This contact should use an email address that your team can access.
Example:
Name: Test Contact
Email: teamtest@yourcompany.com
Status or fields required by the automation entry conditions

Make sure the test contact meets the entry conditions required to trigger the automation.
If the automation is based on a field value, status change, or transaction event, ensure that the test contact includes those values.
Step 2: Trigger the Automation
Once the test contact is prepared, trigger the automation based on its entry conditions.
This can be done by:
Updating a field used in the automation entry conditions
Changing the contact status
Creating or updating a related transaction
Performing the action that normally triggers the automation
After the condition is met, the contact should automatically enroll in the automation.
If you plan to use Enroll Existing Records to trigger the automation for all records that already meet the entry conditions, first test the automation with the Enroll Existing Records toggle off. Once you confirm it works as expected, you can turn the toggle on.
Step 3: Verify Enrollment in the Activity Log
After triggering the automation, review the contact’s Activity Log to confirm that the automation started.
Look for events such as:
Automation enrollment
Workflow steps being executed
Email sends or scheduled delays
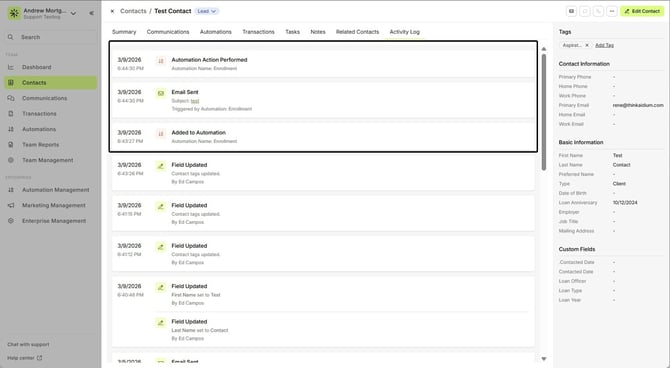
The Activity Log allows you to confirm whether the automation was triggered and how the contact moved through each step.
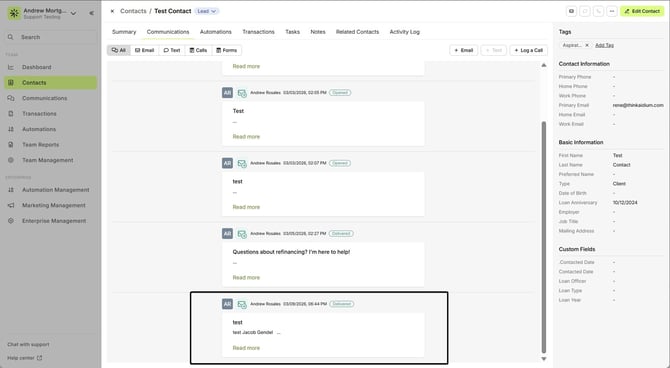
Step 4: Confirm Emails or Actions Were Completed
If the automation includes email sends or other actions, confirm that they were executed correctly.
You can verify this by:
Checking that the test contact received the email
Reviewing timestamps in the Activity Log
Confirming that delays and conditions executed as expected
If an email was not received, check the automation steps and entry conditions to ensure they are configured correctly.
Step 5: Perform Final Checks Before Activation
Before enabling the automation for live use, review the following:
Entry conditions are correctly configured
The correct audience will enroll
Email content and links are accurate
Delays and scheduling are correct
Automation timing aligns with your intended workflow
If the automation is intended for new contacts only, confirm that Enroll Existing Records remains disabled.
Best Practice
Test automations using internal contacts before activating them. This allows you to verify that the workflow behaves correctly and helps prevent unexpected sends to real customers.
Alternative Testing Method
Another option is to fully build and test the contact automation without adding the Entry Conditions. You can manually enroll a test contact into the automation from the Automation tab on the contact record.
Once you confirm the automation works as expected, you can edit the automation and add the Entry Conditions before enabling it for live use.
Need more help? Check out: Intro to Automations
Related Articles
Birthday & Anniversary Automation Setup Guide
Birthday and anniversary automations allow you to automatically send messages to contacts when a specific date occurs each year. These automations are commonly used for: Birthday greetings Loan anniversaries Client appreciation messages Annual ...Understanding Automation Enrollment at Activation
When an automation is enabled in Lendware, the system determines whether contacts or transactions should be enrolled based on the automation’s Entry Conditions and enrollment settings. Depending on how the automation is configured, records that ...Troubleshooting Automations: Step-by-Step Guide and Best Practices
When an automation doesn't perform as expected, it can often be traced back to a few core areas: entry conditions, automation setup, the specific actions within the automation, or the data on the contact or transaction. Step-by-Step Troubleshooting ...Copy One or More Automations from an Existing Team
Admins have a couple of powerful ways to build and distribute automations. One of those is through the Team Automation Copy feature—ideal when you need to duplicate one or more automations from a single team to others. We'll be concentrating on the ...Duplicate an Existing Automation
Duplicating an existing automation is a quick and effective way to reuse a successful setup or adapt it for a different purpose. This feature creates an exact copy of the selected automation, allowing you to modify or expand upon it without starting ...